


Create fade ins on audio regions in Logic Pro using the Fade tool, Region inspector, or automation curves.
What is a Fade In?
A fade in is a gradual increase in volume at the start of an audio region.
Fade ins serve multiple purposes, from eliminating unwanted clicks and pops to creating dramatic build-ups in music production.
They can be applied to individual tracks, groups of tracks, or even entire mixes to achieve the desired effect.
How to Create Fades in Logic Pro
1. Using the Fade Tool

- In the main workspace (Tracks area), find the specific audio region on the track where you want to apply the fade.
- In the toolbar (the upper area of the main workspace), click on the
Pointer Toolicon (usually a white arrow) to reveal a dropdown menu of available tools, and selectFade Tool. - Move your cursor to the beginning (for a fade in) or the end (for a fade out) of the audio region. The cursor will change to reflect the Fade Tool icon.
- Click and hold the mouse button, then drag horizontally into the audio region to set the length of the fade. A shaded area will appear, indicating the fade's duration.
- To change the length of the fade, hover over the edge of the fade area until the cursor changes to a resize icon. Click and drag to extend or shorten the fade as desired.
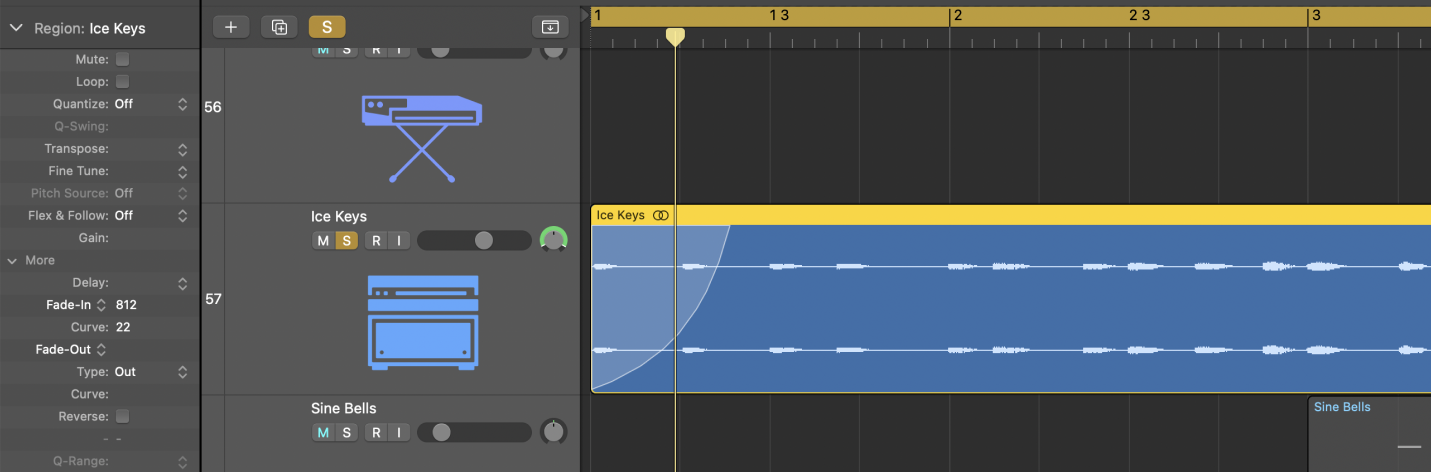
2. Using the Region Inspector
- In the main workspace (Tracks area), click on the specific audio region where you want to apply the fade.
- If the Inspector is not visible on the left side of the workspace, press the
Ikey on your keyboard or click theInspectorbutton located at the top-left corner of the Logic Pro window. - Within the Inspector pane, you'll see sections for
TrackandRegion. Ensure theRegionsection is expanded. If it's collapsed, click the small triangle next to the word "Region" to expand it. - Within the Region Inspector, find the parameters labeled
Fade InandFade Out. These control the fade in (beginning) and fade out (end) of the selected audio region. - Click and hold the numerical value next to
Fade In, then drag your mouse up to increase or down to decrease the duration of the fade in. Alternatively, double-click the value to type in a specific duration. Similarly, adjust theFade Outparameter to set the duration of the fade out at the end of the region.
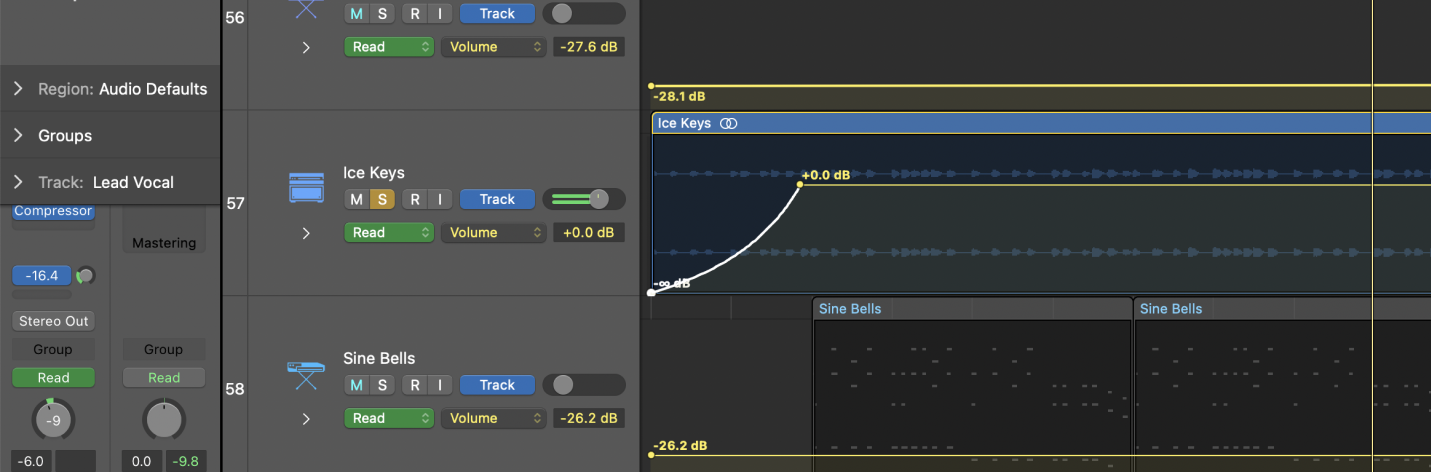
3. Using Automation
- In the main workspace (Tracks area), locate and click on the audio track you want to apply the fade in effect to.
- Press the
Akey on your keyboard to toggle the automation view. This will display automation lanes for all tracks, showing lines that represent various parameters like volume. - On the selected track, click on the
Automation Parametermenu, which typically defaults to "Volume." If it's not set to "Volume," click the dropdown menu and selectVolumefrom the list. - Create automation points for the fade in:
- To set the starting point, move your cursor to the beginning of the audio region where you want the fade in to start and click on the volume automation line to create a point. Drag this point to the bottom, setting the volume to -∞ dB (complete silence).
- To set the ending point, move your cursor to the point in the timeline where you want the fade in to conclude (where the audio reaches full volume) and click on the volume automation line to create a point. Ensure this point is at 0 dB (unity gain), meaning the audio will play at its original recorded volume.
- Adjust the automation curve to smooth the fade in by pressing
ControlandShiftsimultaneously, and clicking and dragging the line between the two automation points
FAQs
What's the difference between a fade in and crossfade?
A fade in only affects the beginning of a single region. A crossfade is a transition between two adjacent regions, fading the first one out while fading the second one in simultaneously.
How long should my fade ins be?
The ideal fade length depends on the audio material and context. As a general rule, shorter fades (5-100ms) work well for eliminating pops and clicks, while longer fades (0.5-5 seconds) are better for smooth musical transitions.
Can I apply the same fade to multiple regions at once?
Yes, select all the desired regions and use the Fade tool or Region inspector as described above. The fade will be applied to all selected regions.
How do I edit an existing fade?
With the Fade tool selected, click the fade area you want to edit. Drag the fade handles to adjust length, or Control-click to change the curve type.
Can I create fades on MIDI regions?
No, fades only apply to audio regions. However, you can create a similar effect on MIDI tracks by drawing volume automation curves.
What if I can't see my fades?
Make sure you have the "Show Fades" option enabled in the Tracks area View menu. If your fade is very short, you may need to zoom in horizontally to see it clearly.
How do I quickly remove a fade?
Select the region and press Option-Command-F to remove the fade in. To remove a fade out, press Option-Shift-Command-F.


